User Tools
Sidebar
documentation:machines:vls23dt
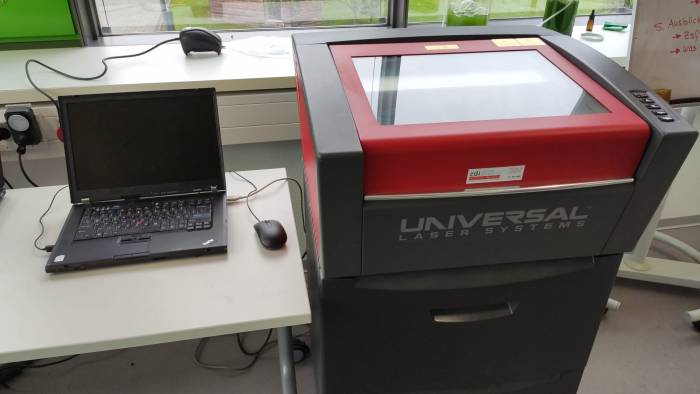
Universal Laser VLS2.3DT
Official website: https://www.ulsinc.com/products/platforms/vls2-30dt
Machine Manual: vls230.pdf
Machine specifications:
- 25W RF laser source
- 400x300mm cutting area
- autofocus
- material library
- automatic filter system
- color mapping
General Instructions
General Information
Even if the machine has a small cutting area and a low power laser, it offers very good cutting quality. It also has the possibility to adjust the laser frequency to regulate the heat transmission. Engraving quality is also quite good, on par with Epilog lasers.
The machine can only be controlled by the laser software, and will be switched off automatically if the software is closed and/or the pc is disconnected.
The laptop close to the machine has all the required software installed to work with the machine.
Import the design
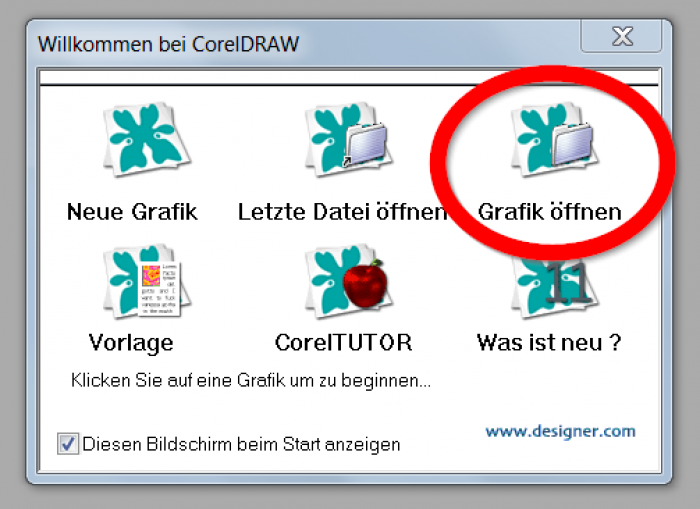
- 1)open Corel Draw 11 by double-clicking on the desktop icon:
- 2)select the option to open graphics:
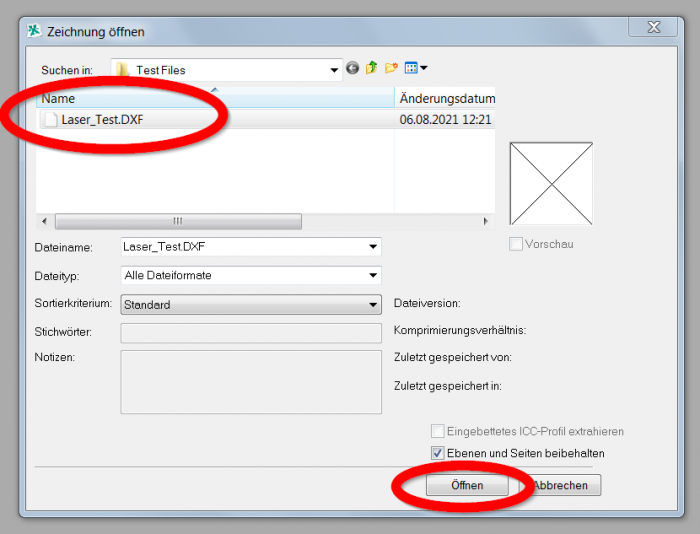
- 3)browse and open your files:
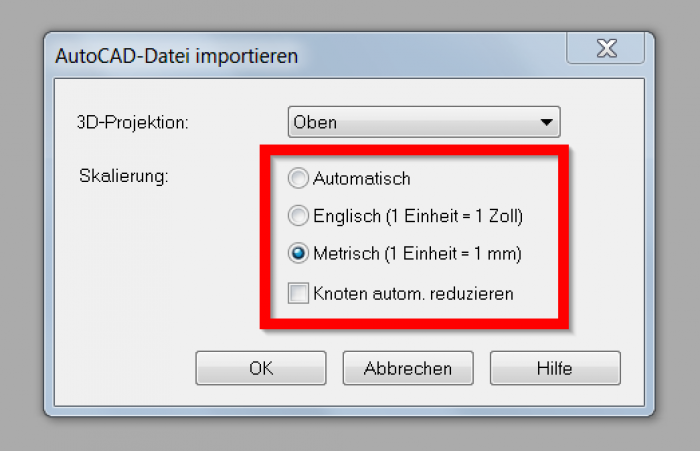
- 4)select the document units, (usually in mm):
Preparing the design
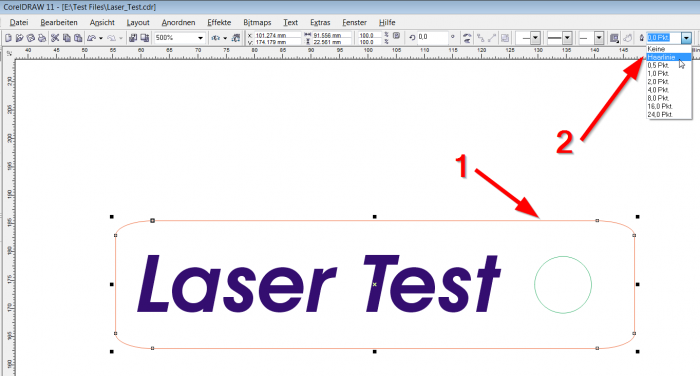
- 1)every line that is a red Hairline will be considered as a cut, to make lines Hairlines select the line and then change the line width on the drop down menu shown in the following picture:
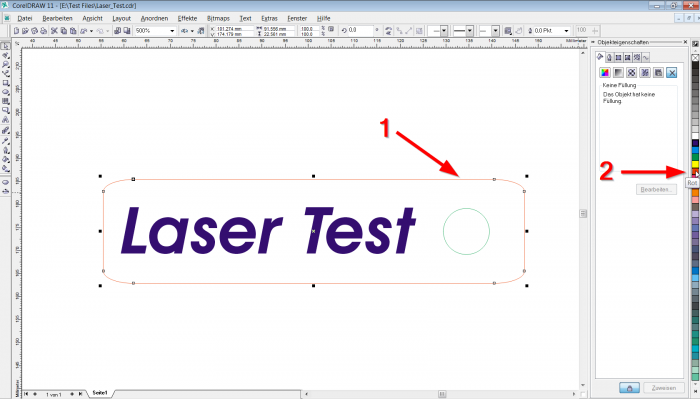
- 2)To change colour of strokes/fills it is sufficient to select a graphic element, and then to select a color from the colors bar on the right; a right click on the color will characterise the the stroke, a left click will characterise the fill. Black fills are considered as engravings. By default the Universal Laser Software UCP uses color mapping to order the different operations.
Send a job to UCP (universal Control Panel)
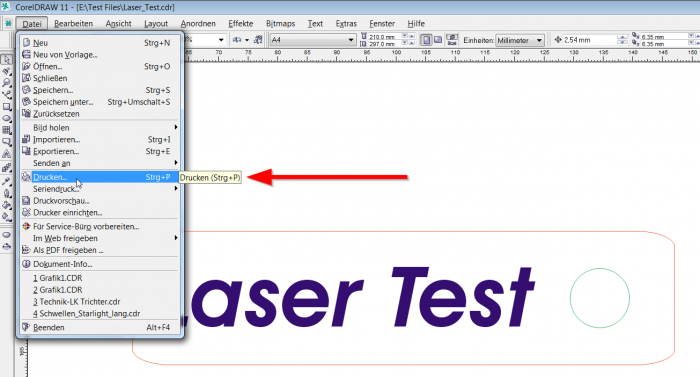
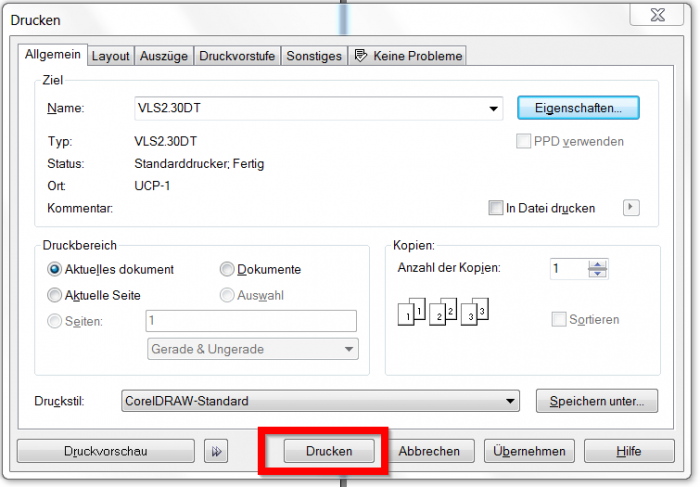
- 1)from Corel Draw, the Universal Laser is seen as a paper printer. To send a job to the UCP software it is therefore necessary to click print:
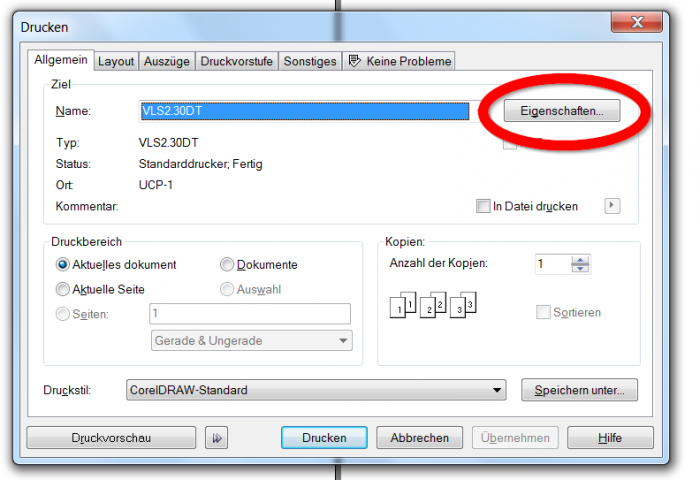
- 2)it is possible to set the laser setting directly from the printing options in Corel Draw:
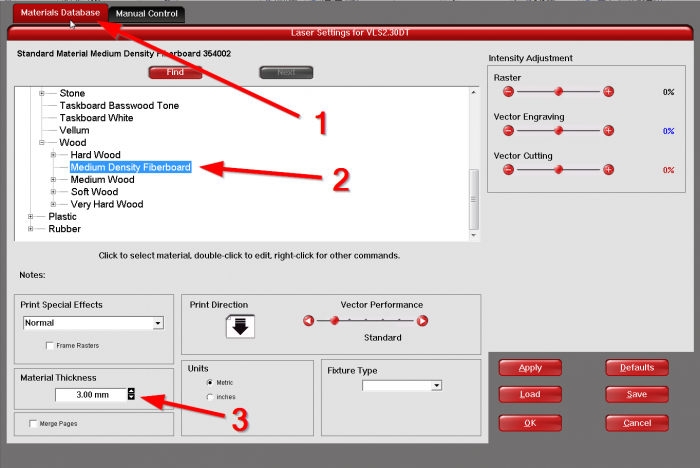
- 3)there are 2 ways of selecting the laser settings, one is to use the material database, the other to set the individual settings manually; to use the material database click on the first option tab (“Manual Database” top), and then browse until you find the material you would like to cut (center); it is important to also enter the material thickness (bottom) to use the autofocus function:
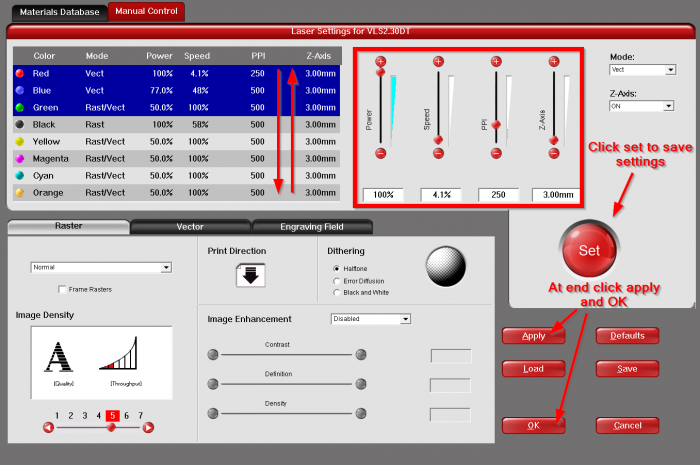
- 4)instead, if you would like to setup the settings manually, you can click on the second tab (“Manual Control” top) and to select manually the wanted settings; this way is recommended in case the settings from the material library have failed, or if you just need more control and understanding of the laser settings. It is important to know that the filter will not start if you set the settings manually, therefore in this case it is possible to use an external filtering unit.
- 5) once the settings have been selected, it is sufficient to click on Print to send the job to UCP:
Launching a job
- 1)once the job has been sent to UCP, it is necessary to open the UCP software to visualise and launch it; the icon of UCP is on the desktop:
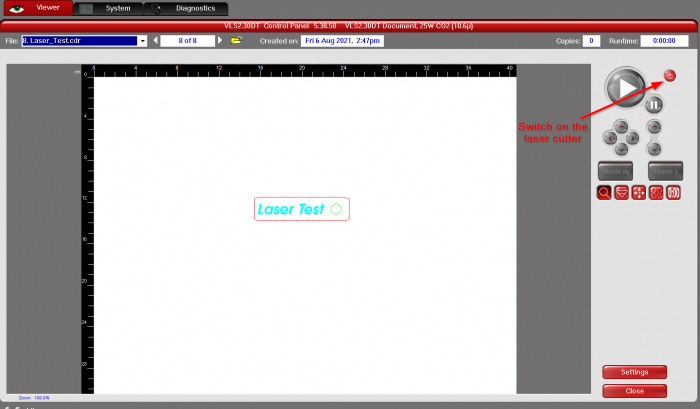
- 2)once the software loads up, the first step is to power on the machine by clicking on the power button on the top right; after clokcing the button you should hear the machine switching on, if not there's a problem and you may need to contact a Fab Lab staff; you should find your design already loaded into the UCP preview; if not you can select the job in the job dropdown list on the top left
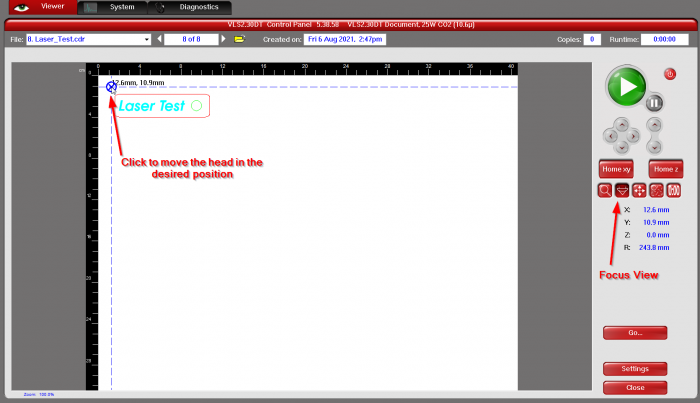
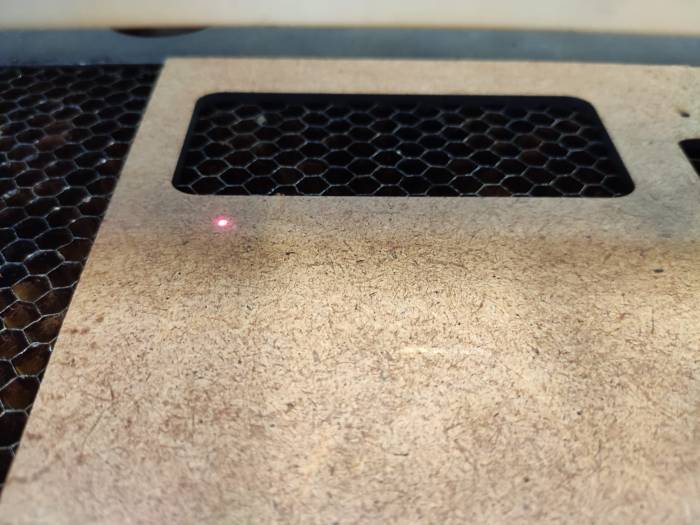
- 3)clicking on the focus view button will allow you to click on any point of the job preview to move the laser head into the clicked position; the laser head has a red laser pointer, making it easier to check the position relative to the job preview to check you are cutting on top of the material:
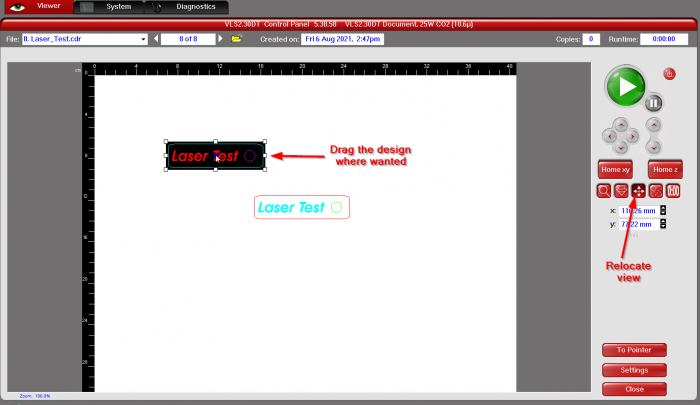
- 4)clicking on the relocate view allows to relocate the job design to another position; this is particularly useful to quickly move the job to the position of the laser pointer to make sure the laser will cut in the desired area:
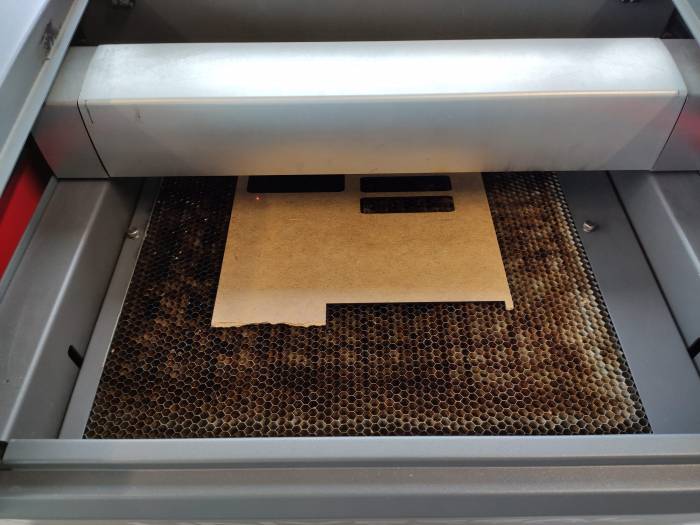
- 5)once the settings are set, you can place the material inside the machine:
- 6) you can check the focus view position by checking the pointer of the laser head, and adjust it until you have it into the desired location:
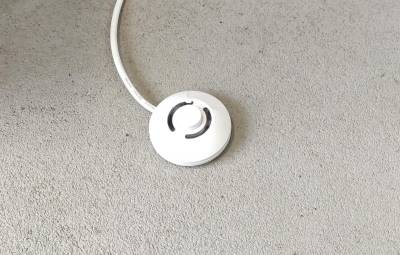
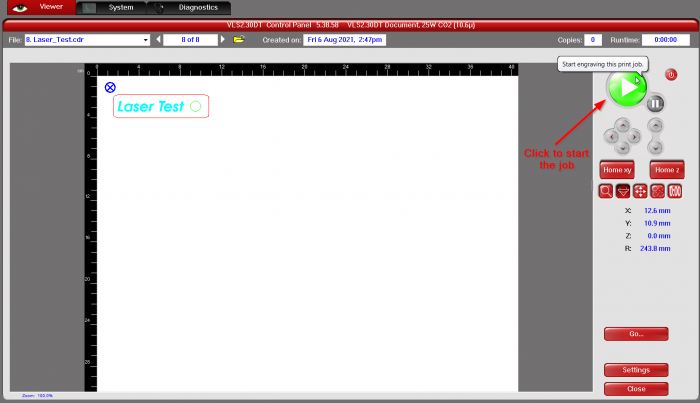
- 7)once the desired position has been reached and the material has been placed inside the laser cutter, by clicking the big Play button the job will be launched. Before you start is important to make sure you started the air assist with the foot switch. The machine filter starts and stops automatically.
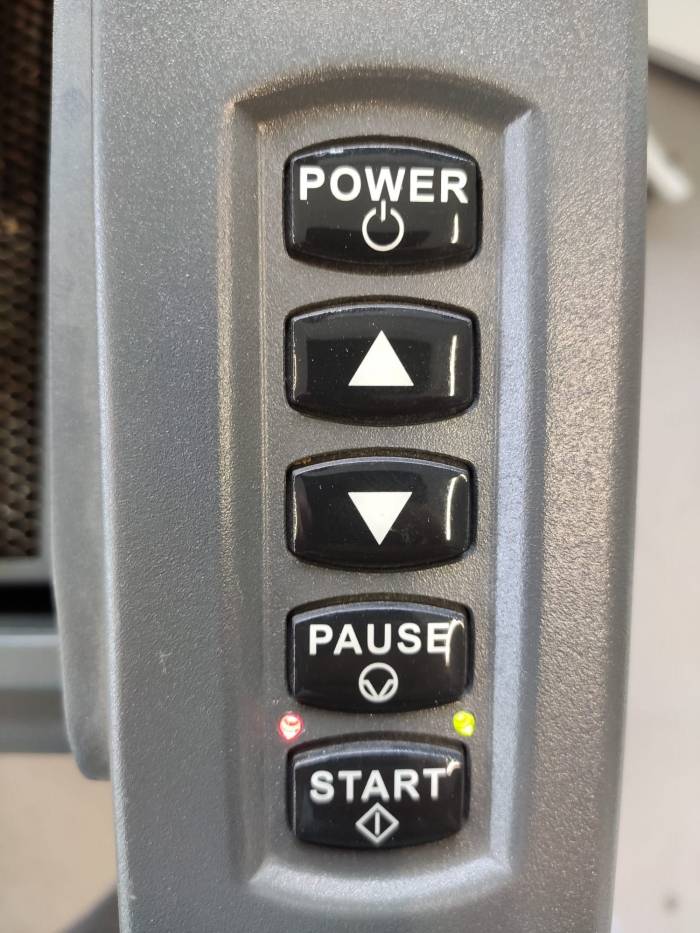
- 8) both the Play button and the physical pause button in the machine will allow you to pause and to resume a job:
documentation/machines/vls23dt.txt · Last modified: 2021/08/19 10:00 by daniele
Except where otherwise noted, content on this wiki is licensed under the following license: CC Attribution-Share Alike 4.0 International

