User Tools
Sidebar
Table of Contents
Kdenlive
Kdenlive (acronym for KDE Non-Linear Video Editor) is a free and open-source video editing software. Kdenlive packages are freely available for Linux, FreeBSD, and Microsoft Windows, and the source code is available under the terms of GNU General Public License version 2 or any later version.
Getting started
This page contains a small tour about the main functionalities of KDEnlive.
The functionalities shown and the screenshots utilize the following:
- operating system: Windows 10
- KDEnlive: standalone version 20.04.1
To download KDEnlive, visit the following website:
https://kdenlive.org/en/download/
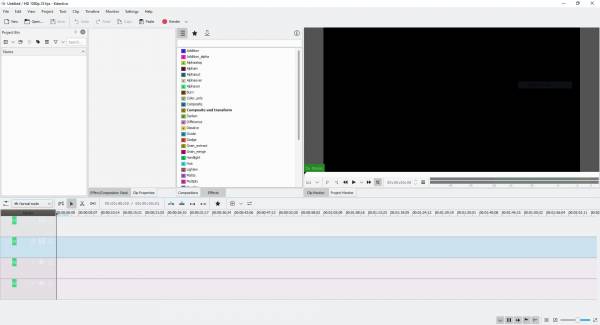
To start the standalone version, it is sufficient to unzip the downloaded archive and to double click on Kdenlive.exe in the “bin” folder. Once KDEnlive starts, the folowing window should appear:
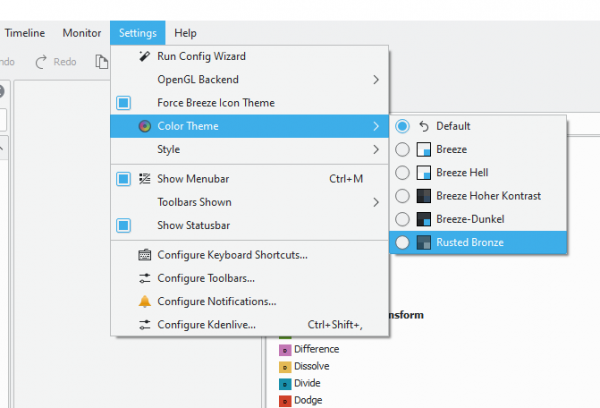
To improve readability and avoid some text displaying issues, the “Rusted Bronze” color theme is used. It is possible to change the color scheme, by clicking on the menu' “Settings→Color Theme→Rusted Bronze”, as shown in the following image:
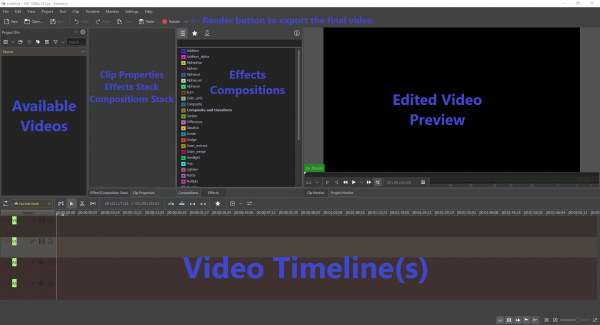
The KDEnlive interface is divided in different sections:
- Project Bin, where the available videos are shown; these will video will be the ones available to KDEnlive for editing, mixing etc
- Video Timelines, where the modifications to the videos are set, and as well representing the flow of the final video
- Effects and Compositions, a palette of available effects and compositions that can be applied to the videos in the timeline
- Clip properties, Effects and Composition Stacks, here the current properties of a video in the timeline are shown; stacks are the list of effects and compositions currently applied to the video, from the stacks is possible to change the single properties of the effects and compositions
- Video Preview, a video player rendering the current timelines of video, useful to check the video before rendering it to final version
The different sections are identified below:
Adding videos to the project
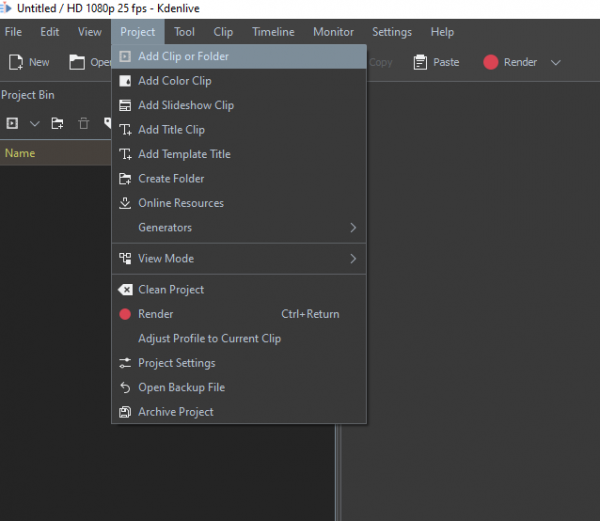
To add videos to the project, it is possible to either use the menu function “Project→Add Clip or Folder”. If a folder is added, all the videos in that folder will be added to the project.
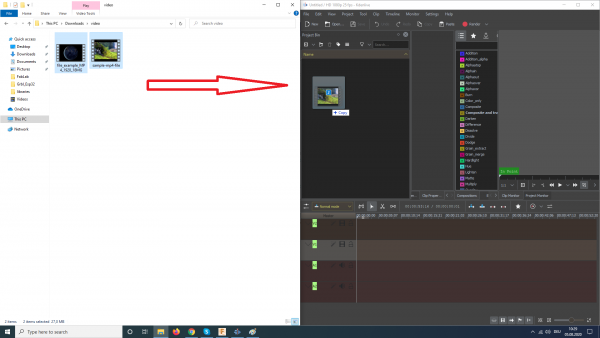
Alternatively is also possible to drag and drop the videos from the file browser:
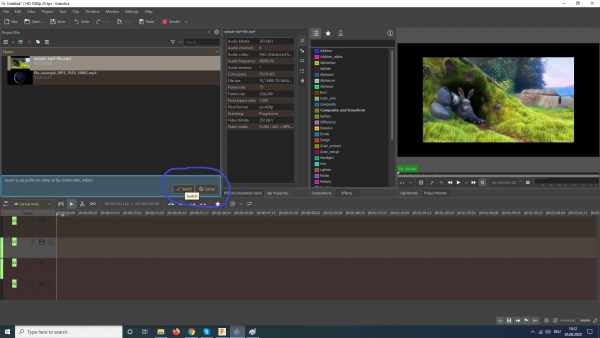
Once the videos are in the project bin, KDEnlive will detect their properties and eventually propose a change of profile for the rendering. It is recommended to accept the change.
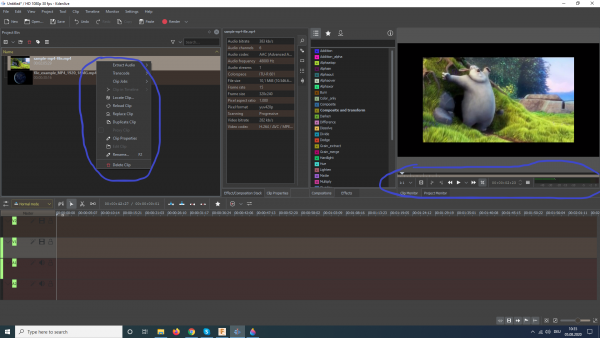
By selecting a video in the project bin is possible to play it into the video preview on the right side, and as well to do some basic operations, such as duplicate, locate in the file system, delete, extract audio, transcode to another format etc. The properties of the video will be shown into the properties section.
Basic video editing
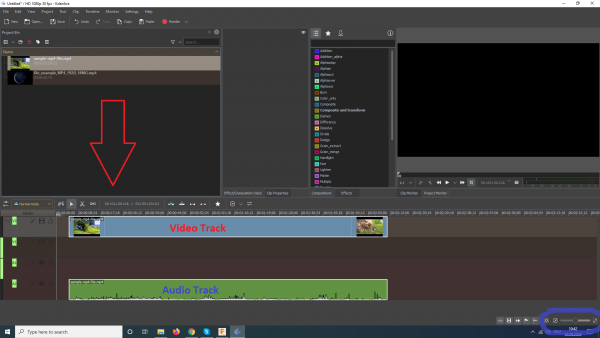
To start editing a video, it is first necessary to bring it into the timeline. To do so it is possible to drag and drop the video onto it:
If an audio track is present inside the video, KDEnlive will automatically split the audio and video track into two different rows, so it is possible to modify them interdependently. It is possible to adjust the time length of the time line by moving left or right the Zoom slide, on the bottom right of the screen.
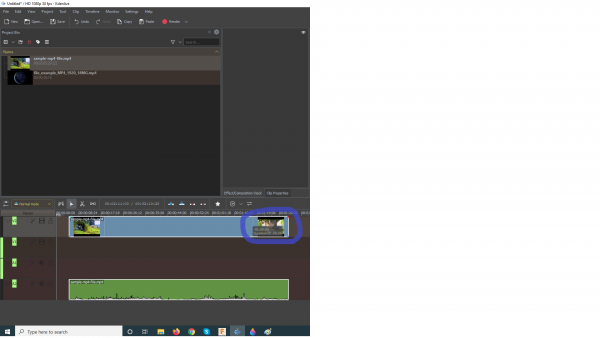
To shorten the video length by cutting out the edges of it, is sufficient to drag the videos edge from the timeline. The total length will be reduce and the beginning/end of it will be removed from the final video. While dragging the edge, KDEnlive shows the amount of video that is being removed. The audio will be removed accordingly.
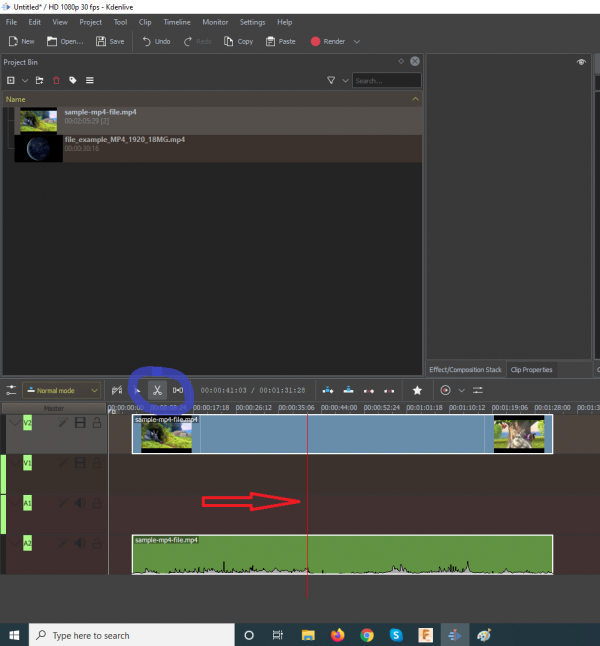
To split a video at a specific point, the Razor tool can be used. To apply a cut first click onto the Razor tool, located on top of the video timeline, and then click inside the selected time inside the timeline. To be noted that also the audio will be cut at that point.
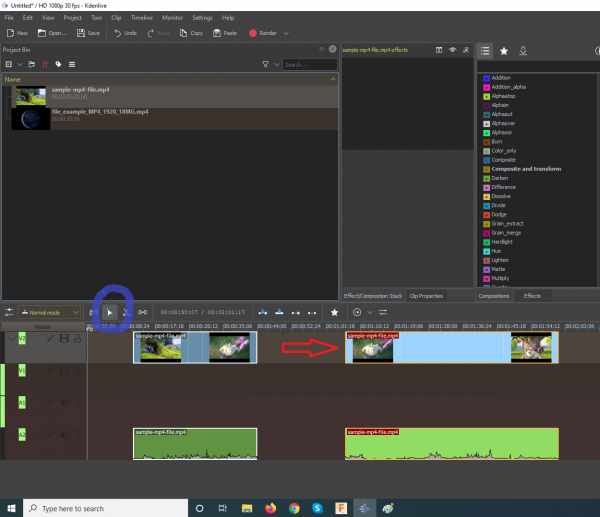
After the cut has been applied, new edges will be created, and the video parts can be moved independently inside the video timeline. To move the videos, it is necessary to activate the selection tool:
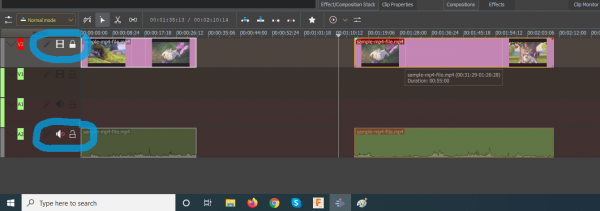
Additional simple commands are the possibility to disable/enable a video/audio track, to lock it (so it cannot be move along the timeline):
Video effects and text
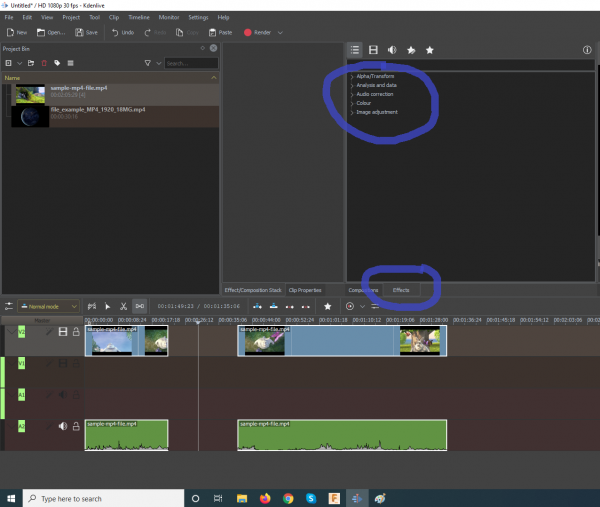
KDEnlive offers a set of standard effects, that can be applied to any of the videos in the timeline. The effects are listed into the effects tab and they are grouped in different categories:
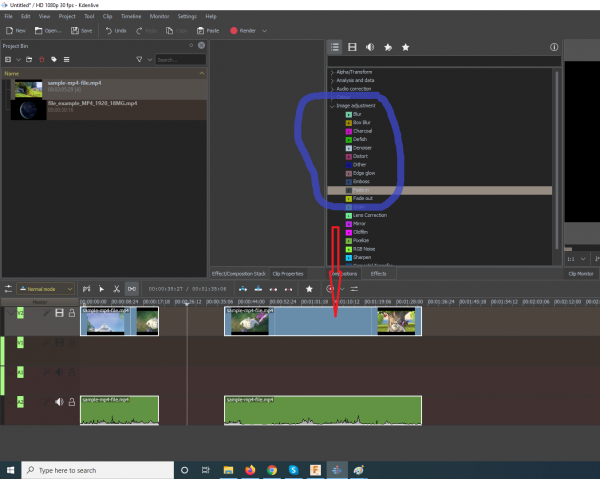
To apply an effect, simply drag and drop it onto a video:
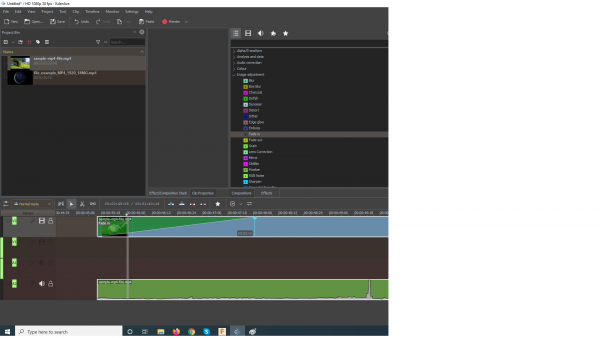
Once the effect has been applied changes will be shown in the timeline section of the video. Also some effects can be adjusted by dragging the cursors inside the video, for example the length of the “fade in” effect can be adjusted:
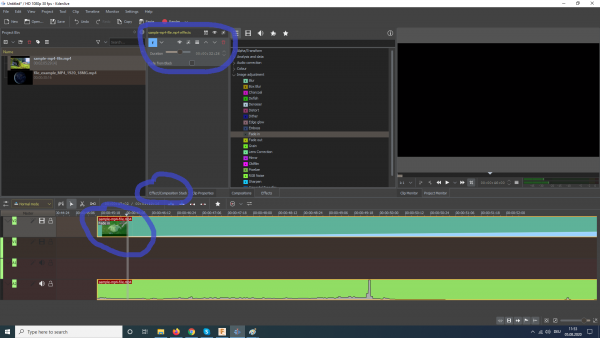
To further change the effects properties, and as well to access all of the available settings of it, click on the “Effect/Composition Stack”. The stack also contains the list of all the effects applied to a video. From the stack, it is possible to delete the unwanted effects. Effects will be rendered in real-time in the video preview.
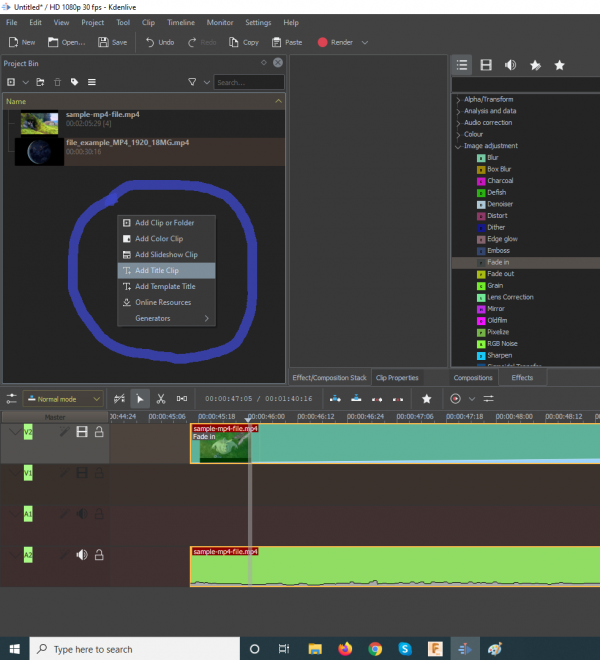
Text, images and shapes can be added to a video as well. These elements are considered as video elements in the project bin. The difference is the user can create them directly in KDEnlive, and then add them to the timeline as any other video. The following images will show how to create and add a text to a video. Right clicking in the project bin area will pop-up a small menu' where is possible to find the “Add Title Clip” button.
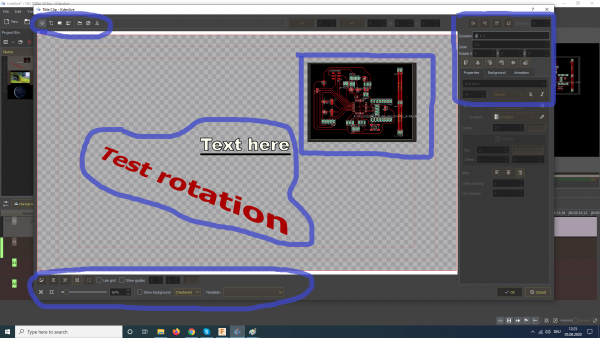
KDEnlive offers a specialized editor to add text/ images/shapes to videos. In the center of the editor is the preview of the added elements, on the top left the buttons to load new elements, on the top right the settings to edit the elements (font, size, colors, rotations etc), and on the bottom left are commands to adjust the preview.
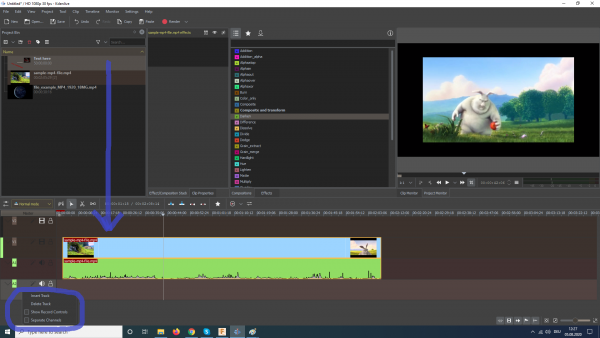
Once the “Text Clip” has been created, it will be shown inside the project bin, together with previously added videos. To add the clip to the timeline, it is sufficient to drag it to the desired position. The height of the row in the timeline defines the displaying order, like any other vector graphics software (eg Inkscape, Illustrator), where is possible to bring objects in the foreground/background. To be able to see the “Text Clip”, it is therefore recommended to add it to the first row.
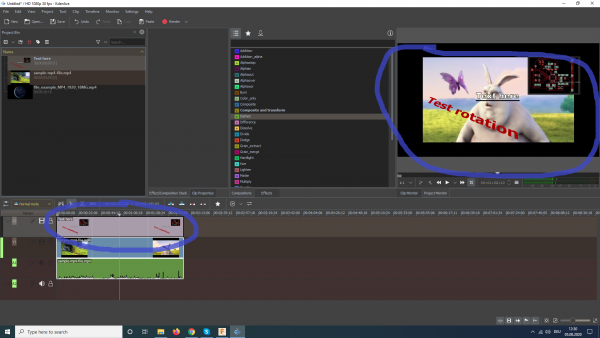
The result of adding the “Text Clip”, is shown in the video preview.
Render the final video
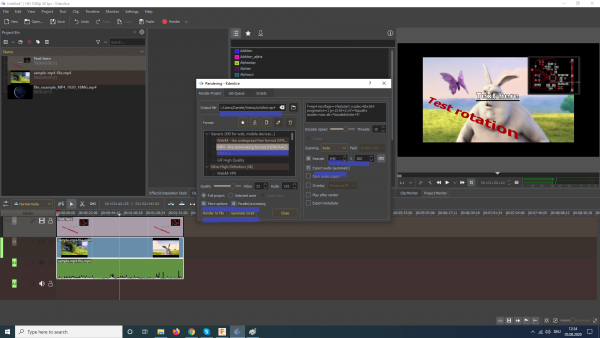
After applying all the wanted effects, adjusted the length of the videos, added the proper text, etc etc, it is possible to render the video for exporting. By clicking on the “Render” button (the red dot in the middle top), a small pop-up will appear about the render settings. Here is possible to resize the video to a desired resolution, change the video format, adjust the quality of the video and of the audio, set the path were to save the video etc. Make sure all the settings are correct before pushing the “Render to File” button, which will save the final video.

